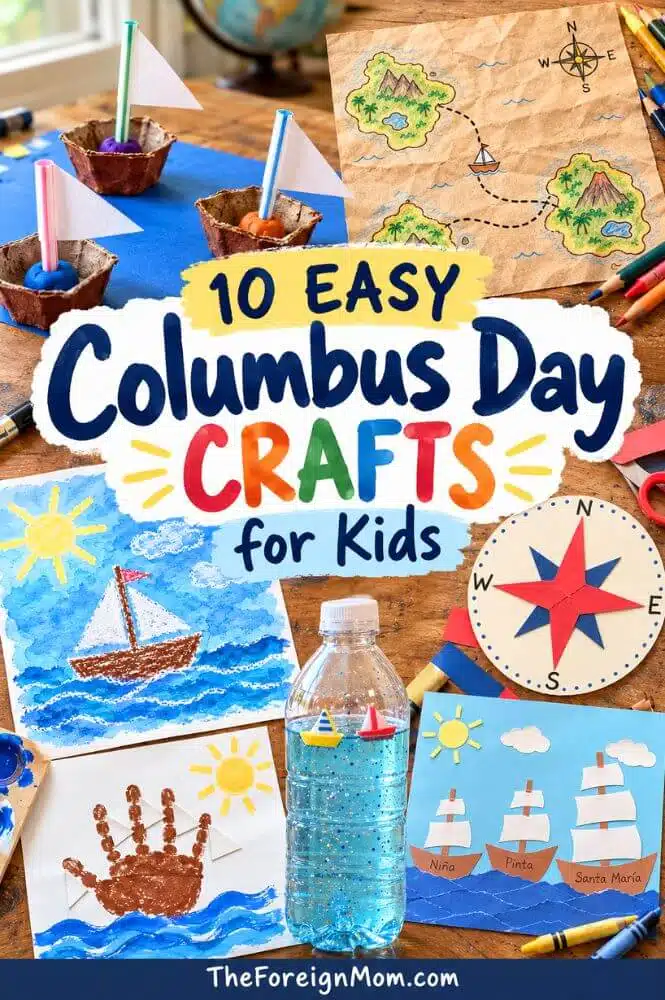
Looking for easy Columbus Day crafts for kids that don’t require a trip to the craft store? These simple ideas use paper plates, construction paper, egg cartons, and a few other everyday supplies.
I like keeping kids’ crafts simple. A little paint, some paper, and room to be creative can turn an ordinary afternoon into a fun activity. The sails don’t have to be straight, and the ocean waves don’t have to match. That’s part of the charm!
Below, you’ll find 10 fun Columbus Day crafts with supply lists, step-by-step instructions, and tips for younger kids. Choose one for an afternoon at home or use a few alongside classroom lesson plans about oceans, maps, and early explorers.
This site may contain affiliate links to products. I may receive a small commission (at no extra cost to you) for purchases made through these links. This helps me to pay for my website hosting and other blog-related expenses. Thank you for supporting this blog.
Table of Contents
A Little History Before You Start
In the United States, Columbus Day is a federal holiday observed on the second Monday in October. It commemorates Christopher Columbus’s arrival in the Americas in 1492. His first landing was in the Bahamas, where Indigenous people already lived.
Columbus sailed across the Atlantic Ocean hoping to reach Asia, sometimes called the Far East in older historical materials. Queen Isabella and King Ferdinand of Spain supported his voyage. Although you may see the phrase “New World” in children’s books, the Americas were already home to many peoples and cultures.
Many communities also observe Indigenous Peoples’ Day to honor Indigenous histories, cultures, and people today. These ocean and navigation crafts can accompany an age-appropriate conversation that includes those perspectives.
10 Easy Columbus Day Crafts for Kids
Ready for a little crafting fun? These Columbus Day crafts for kids turn everyday supplies into sailing ships, ocean scenes, and explorers’ maps. Each idea includes simple instructions, so you can pick a project, gather your supplies, and let the kids get creative!
1. Paper Plate Sailing Ship
This paper plate ship is a simple place to start, especially with younger kids. The painted waves and paper sails give children a few different things to work on without making the project complicated.
Paint the bottom half of the paper plate ocean blue. Use a few curved brushstrokes to create waves, then let it dry.
Cut a wide boat hull from brown construction paper. A shape with a flat top and a narrower bottom works well.
Glue the hull onto the plate so its bottom overlaps the painted ocean slightly.
Glue a craft stick vertically behind the top edge of the hull to make the mast.
Cut two triangular white paper sails and glue one on each side of the mast, leaving a little of the stick showing.
Helpful tip: Small paper dessert plates work for a mini version. Cut the hull and sails ahead of time if your child is still learning to use scissors.
If your little one needs a little practice before cutting out the sails, try my free cutting practice worksheets for kids. You can work on a few together before starting the craft.
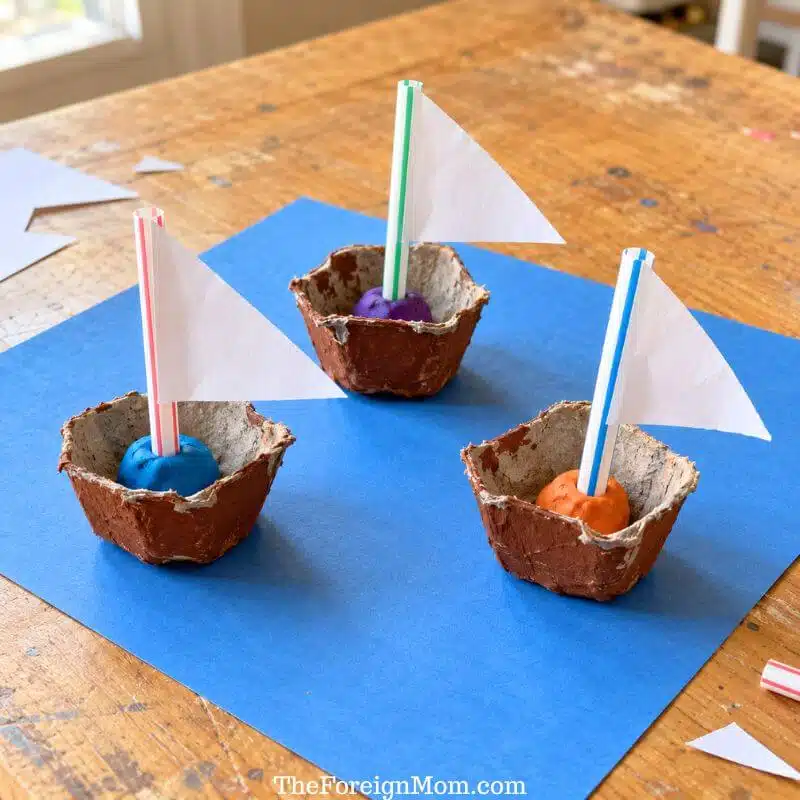
2. Egg Carton Boats
An empty egg carton can become a whole collection of little boats. Different straw colors and sail sizes make each one look a little different, which is what makes this fun craft so cute.
Spread a thin layer of brown finger paint onto your child’s palm and fingers.
Press the hand onto the paper with the fingers pointing toward the top. Lift it straight up, wash the hand, and let the print dry.
Cut small triangular sails from white paper. Lightly outline them with a pencil so they stand out against the white background.
Glue the sails beside the finger marks, leaving some of the brown handprint visible.
Paint blue waves below the palm and add a yellow sun in one corner.
Helpful tip: Write your child’s name and the date on the back. You’ll be glad you did when you look at that little handprint later!
4. Niña, Pinta, and Santa María Paper Ships
This paper craft gives kids space to create three different ships in one ocean scene. Make the hulls and sails different sizes, then add handwritten labels to match the picture.
Cut three brown boat hulls: one small, one medium, and one large. Cut narrow brown strips for the masts.
Glue the hulls and masts onto the light blue background, leaving room above each ship for sails.
Cut white paper sails and glue them beside or across the masts. Give each ship a slightly different arrangement.
Tear dark blue paper into wavy strips and glue them across the bottom, overlapping the lower edges of the hulls.
Label the ships Niña, Pinta, and Santa María with a black marker. Finish with a yellow paper sun and white paper clouds.
Helpful tip: Write the ship names on separate slips of paper for younger kids to copy or glue onto their boats.
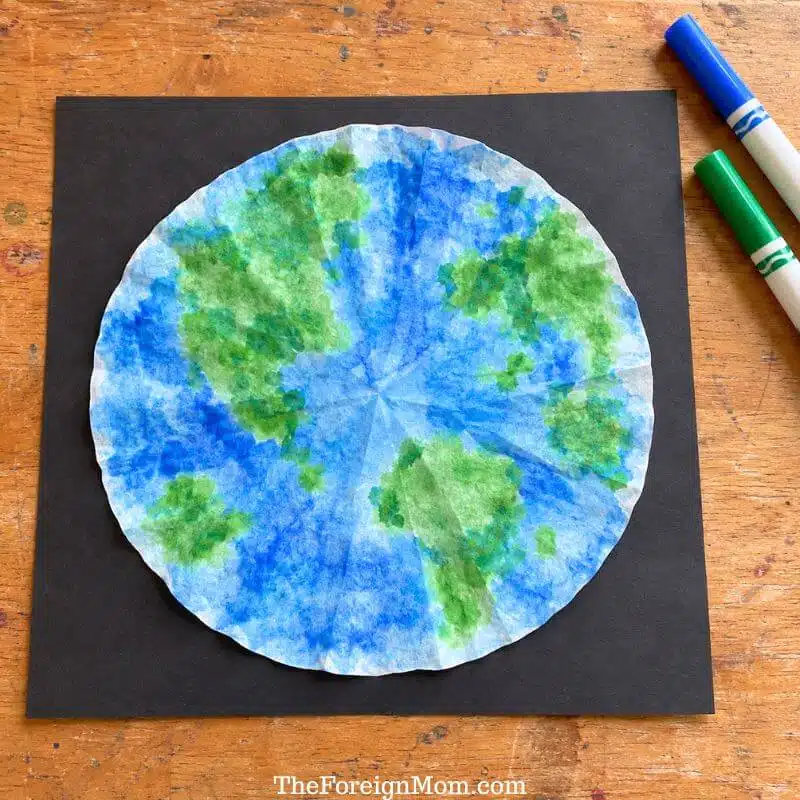
5. Coffee Filter Earth
This coffee filter craft is all about watching colors blend. A little water turns blue and green marker scribbles into a soft, Earth-inspired picture, and the black background helps the colors stand out.
Flatten the coffee filter on a tray or another protected surface.
Draw irregular green patches for land. Color much of the remaining space blue for the ocean.
Lightly mist the filter with water. Start with just a few sprays and watch the colors spread.
Leave it flat until completely dry.
Glue the dry filter onto black construction paper, using a small amount of glue around the center and edges.
Helpful tip: This is an Earth-inspired art project, so the land shapes don’t need to be an accurate map. Older kids can look at a globe first and try adding a recognizable North America.
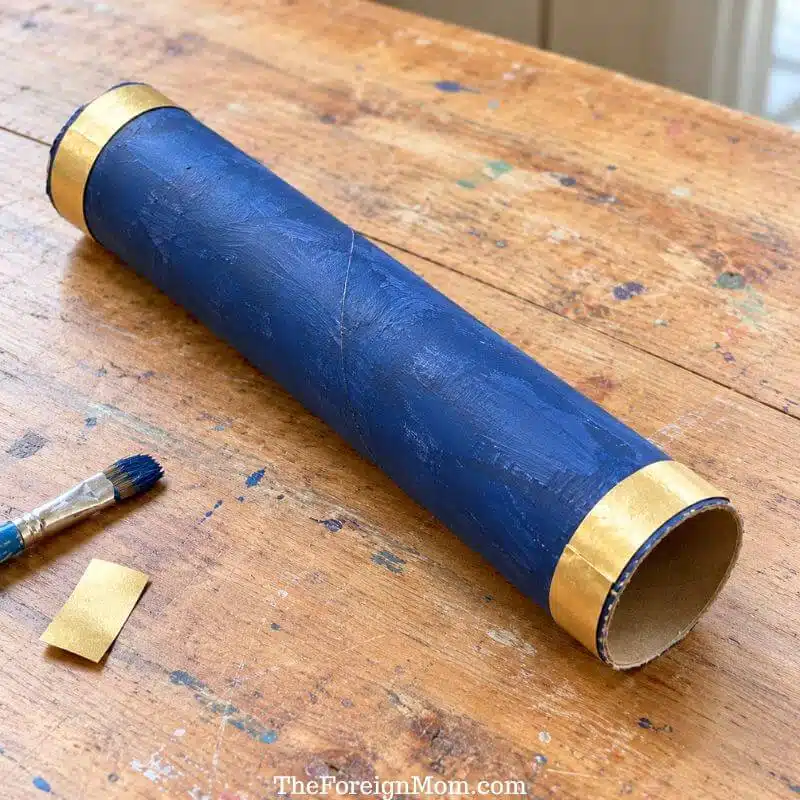
6. Cardboard Tube Telescope
A cardboard tube telescope is a great way to carry the activity into pretend play. Once the paint dries, kids can look for imaginary islands, ships, or a place to land.
Paint the outside of the cardboard tube navy blue.
Set it aside until the paint is completely dry.
Cut two narrow strips of gold paper, each long enough to wrap around the tube.
Wrap one strip around each end and secure the overlapping ends with glue or tape.
Keep both openings clear so your child can look through the tube during pretend play.
Helpful tip: Pair the telescope with a cardboard box boat or the explorer’s map below. It’s a pretend telescope, so there’s no need to add lenses or anything complicated.
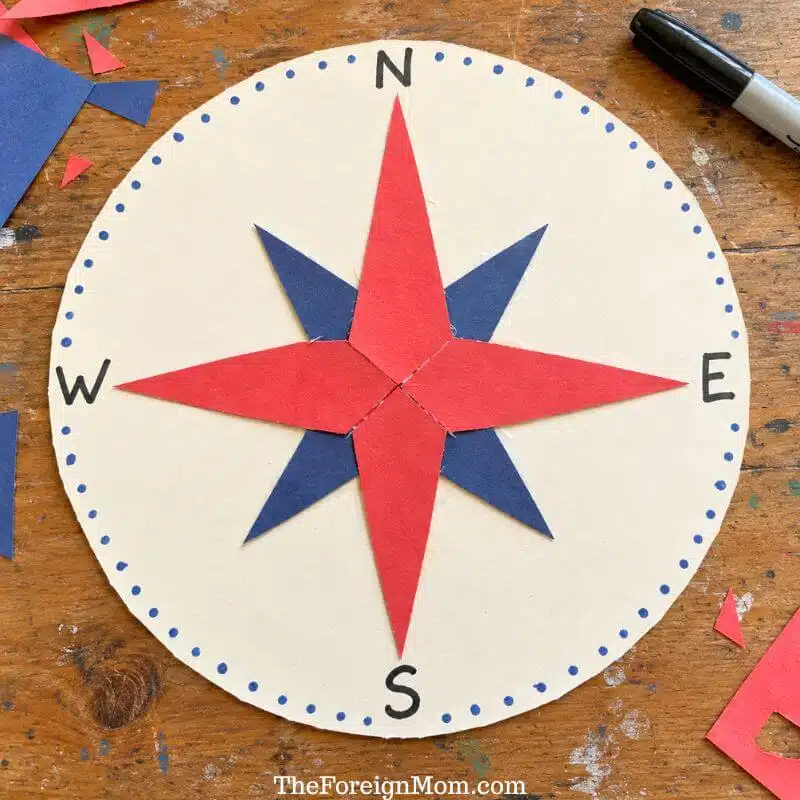
7. Paper Compass Rose
If your child enjoys maps, this compass rose is a fun activity to try. It also gives you an easy way to introduce north, south, east, and west while cutting and gluing paper shapes.
Trace a large circle onto cardstock and cut it out.
Cut four long, narrow red triangles and four shorter navy triangles.
Arrange the red triangles with their tips pointing up, right, down, and left. Place the navy triangles between them to make an eight-point star.
Glue the pieces in place, with their bases meeting at the center. Write N at the top, E on the right, S at the bottom, and W on the left.
Add small blue dots around the border to decorate the circle.
Helpful tip: Explain that the paper shows directions but doesn’t find north on its own. Use a real compass to identify north, then turn the craft to match.
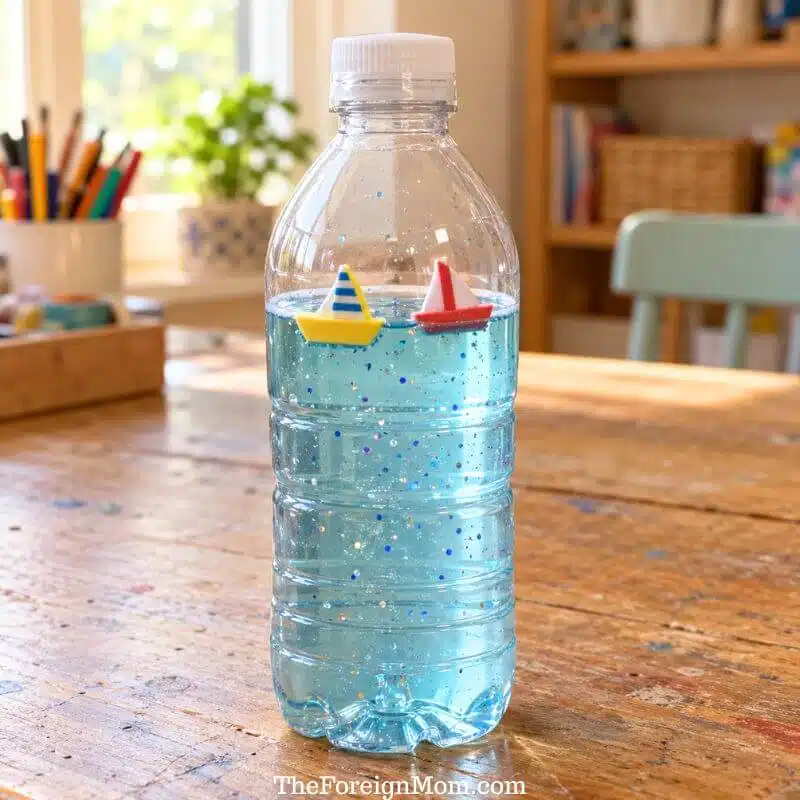
8. Ocean Discovery Bottle
This ocean bottle adds something a little different to the collection. Pale blue water, a sprinkle of glitter, and small foam boats make a simple ocean scene that kids can watch and gently tilt.
Waterproof adhesive suitable for plastic and strong tape
How to Make It
Remove the bottle’s label, wash it, and let it dry.
Cut two tiny, flat sailboat shapes from craft foam. Draw the sail details with a waterproof marker and check that each piece fits through the bottle opening.
Fill the bottle about two-thirds to three-quarters full with water. Add a small amount of blue food coloring so the water stays light enough to see through.
Add a little glitter and the foam boats. Check that the boats float before sealing the bottle.
Have an adult apply a suitable waterproof adhesive to the cap threads, tighten the cap, and follow the adhesive’s curing directions. Add strong tape around the closed cap.
Helpful tip: Thin, one-piece foam boats are easier to fit through the neck than boats assembled from several pieces. Keep the bottle sealed and supervise younger kids during use. The foam boats may float flat or tip onto their sides, and that’s okay! They’re decorations for the sensory bottle rather than working toy boats.
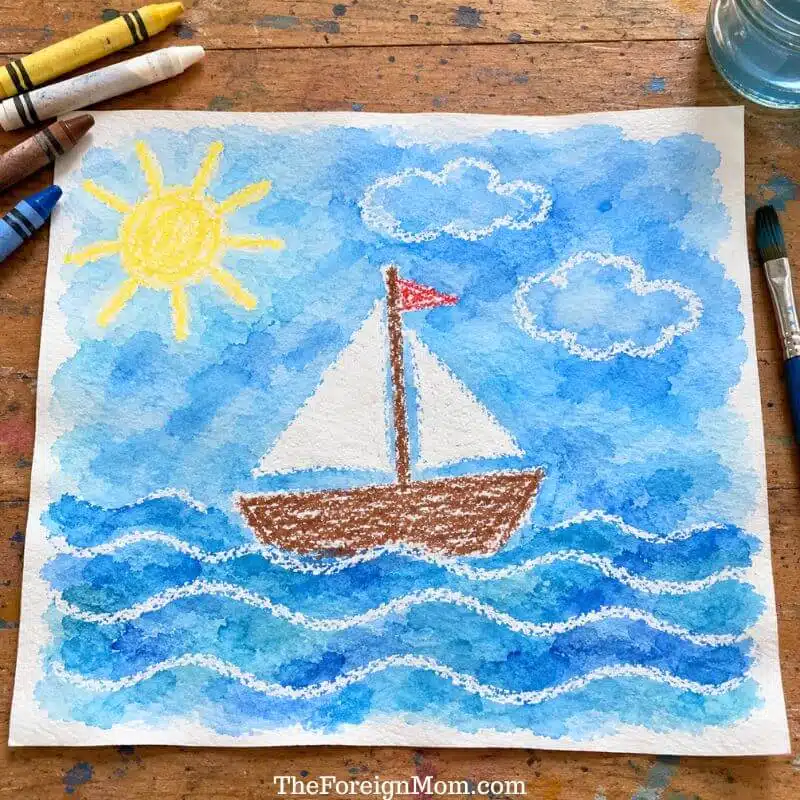
Crayon resist painting feels a little magical because the wax drawing shows through the watercolor. White crayons are especially fun here because the sails, clouds, and waves become easier to see as kids brush on the blue paint.
Draw a brown boat hull and mast with a wax crayon, pressing firmly.
Use a white crayon to draw and fill in the sails. Add white clouds and curved wave lines.
Draw a yellow sun and a small red flag at the top of the mast.
Mix blue watercolor with enough water to make a light wash. Brush it gently over the picture.
Let the painting dry flat before displaying it.
Helpful tip: Press firmly with the crayons and keep the paint watery. A thick layer of paint can hide the wax instead of showing the resist effect.
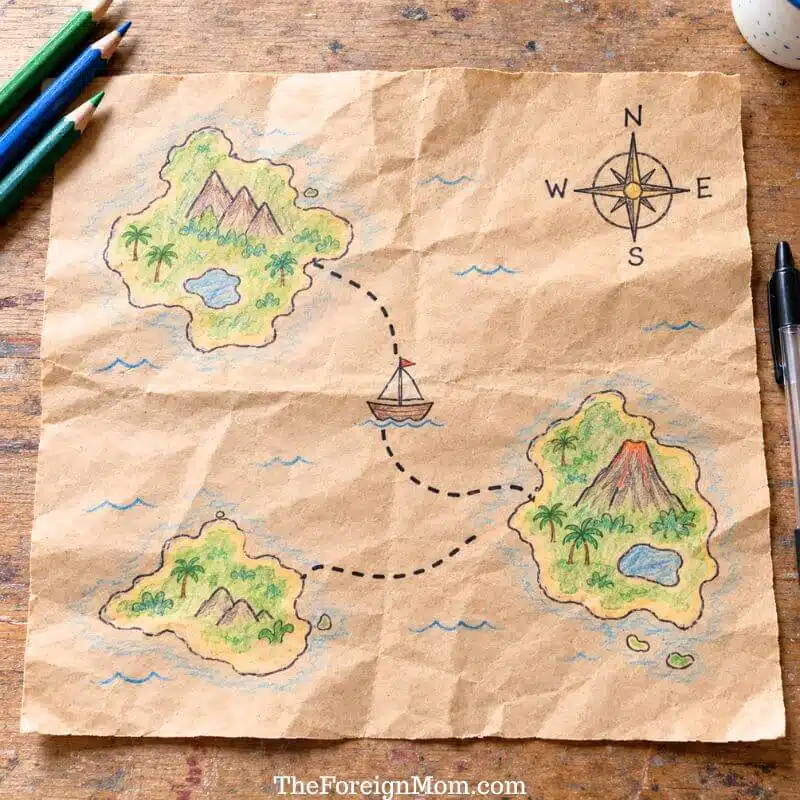
10. Explorer’s Map
This is a perfect way to finish the craft session with some imaginative play. Kids can draw their own islands, plan a sailing route, and use the finished map for a pretend treasure hunt.
Cut a flat piece of kraft paper. Gently crumple it, then smooth it out to create an aged look.
Sketch a few imaginary islands and outline their coastlines with black pen.
Add green land, blue waves, and simple details such as trees or mountains with colored pencils.
Draw a dotted sailing route between the islands and add a little ship along the route.
Draw a compass rose in one corner, labeling north at the top, east on the right, south at the bottom, and west on the left.
Helpful tip: The pictured craft is an imaginary map. If you want to make a map of Columbus’s first voyage instead, use a reliable historical map to show the route from Spain across the Atlantic to the Bahamas.
For another geography activity, print my free blank map of the USA worksheet. Use it separately to explore the states and talk about where your family lives.
Easy Ways to Turn These Crafts into Learning Activities
You don’t need a long lesson to make these projects meaningful. Choose one simple idea to go with your craft:
Read together. Pair the project with age-appropriate children’s books about oceans, navigation, Columbus, or Indigenous peoples. Look for books that explain who already lived in the Americas.
Practice vocabulary. Use words such as ship, sail, ocean, map, and compass. Older children can use them as spelling words or write a sentence about their craft.
Add a writing activity. For a 3rd grade class, ask children to explain how they made their compass rose or describe the route on their imaginary map.
Explore the globe. Find Spain, the Atlantic Ocean, and the Bahamas together. Compare the real locations with the pretend islands in the map craft.
Talk about the Columbian Exchange. Older children can learn how plants, animals, and diseases moved between the Americas and other parts of the world following European contact, with profound effects on people and environments.
Cutting, tearing, painting, and gluing also give young learners opportunities to practice fine motor skills. Let children do the parts they can manage, and help with anything that feels frustrating.
Which Columbus Day Crafts Are Best for Younger Kids?
The paper plate ship, handprint ship, and coffee filter Earth are good starting points for preschoolers and kindergarteners. Prepare the cut pieces first, then let children focus on painting, coloring, and gluing.
The three ships collage, compass rose, and explorer’s map give older children more room for detailed work. Kids of all ages can enjoy the ideas with a little help and a few adjustments.
If you’re planning more activities for the season, take a look at my apple activities for preschoolers. They’re a fun way to keep the fall learning going.
You don’t need to make all 10. Pick the one that fits your supplies and your child’s interests, cover the table, and enjoy a creative afternoon together. A slightly crooked sail can still make a wonderful little ship!
Already thinking about the next holiday? Take a look at my turkey in disguise ideas for a fun Thanksgiving project. And when Christmas gets closer, save my Elf on the Shelf ideasfor a little holiday fun!
Let’s Stay in Touch!
Which of these Columbus Day crafts for kids will you try? Let me know in the comments! Follow The Foreign Mom on Pinterest for more easy crafts, free printables, and fun activities, and save this post for your next craft day.